Kubota wiring diagrams are essential visual guides for understanding electrical systems in Kubota tractors and equipment, aiding in maintenance, troubleshooting, and repairs. Available as downloadable PDFs online, these diagrams provide detailed schematics for various Kubota models, ensuring proper diagnosis and safe electrical work.
What is a Kubota Wiring Diagram?
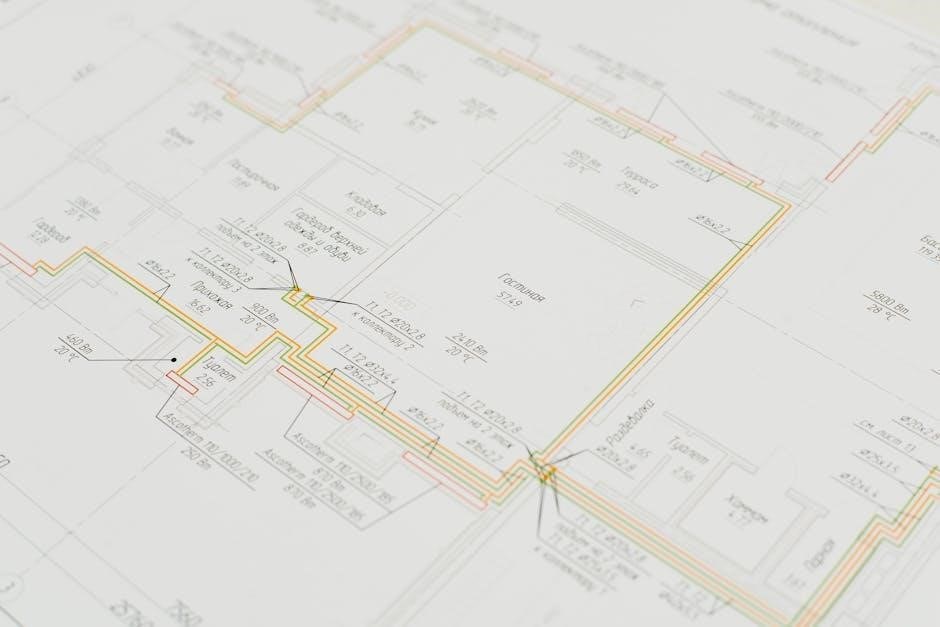
A Kubota wiring diagram is a detailed visual guide illustrating the electrical circuitry of Kubota tractors and equipment. It provides a clear layout of wires, connectors, and components, such as fuses, relays, and sensors, enabling users to understand how systems interact. These diagrams are essential for diagnosing electrical issues, performing repairs, and ensuring proper installation of aftermarket accessories. Available in PDF format, they are a valuable resource for mechanics and DIY enthusiasts, offering a comprehensive overview of the machine’s electrical architecture to maintain safety and functionality.
Importance of Wiring Diagrams for Kubota Tractors
Kubota wiring diagrams are crucial for maintaining, repairing, and troubleshooting electrical systems in Kubota tractors. They provide a clear roadmap of the tractor’s electrical circuits, ensuring safe and accurate diagnostics. By following these diagrams, users can identify faulty components, avoid costly mistakes, and prevent potential hazards. Wiring diagrams are essential for both professional mechanics and DIY enthusiasts, enabling them to understand complex systems and perform repairs efficiently. They also facilitate compliance with manufacturer standards, ensuring optimal performance and longevity of the equipment. Accessible in PDF formats, these diagrams are indispensable tools for anyone working with Kubota machinery.

Sources for Kubota Wiring Diagrams
Kubota wiring diagrams are available through official Kubota manuals, authorized dealers, and online forums. PDF downloads from trusted sources ensure accurate and reliable electrical schematics for various models.
Official Kubota Manuals and PDF Downloads
Official Kubota manuals are the most reliable source for wiring diagrams, offering detailed schematics for specific tractor models. These PDF downloads are available on Kubota’s official website and authorized dealer platforms. They include comprehensive electrical system overviews, making it easier to identify components and troubleshoot issues. The manuals are updated regularly to reflect the latest model changes and technical specifications. Users can search for their tractor model to find the exact wiring diagram needed for repairs or maintenance. This ensures accuracy and safety when working with electrical systems.
Online Forums and Communities
Online forums and communities are invaluable resources for locating Kubota wiring diagrams. Platforms like TractorByNet and Kubota Forums host extensive discussions where users share diagrams, repair experiences, and troubleshooting tips. These communities often include detailed wiring schematics uploaded by experienced technicians and enthusiasts. Many users post PDF versions of wiring diagrams for specific Kubota models, making it easier to find the exact schematic needed. While these resources are highly beneficial, it’s important to verify the accuracy of shared information. Additionally, some forums offer free downloads of wiring diagrams, saving time and effort in diagnosing electrical issues.
Authorized Kubota Dealers and Service Centers
Authorized Kubota dealers and service centers are reliable sources for obtaining accurate wiring diagrams. These centers provide official PDF manuals and schematics, ensuring the information is up-to-date and specific to your tractor model. Dealers often have direct access to Kubota’s technical database, guaranteeing the diagrams are authentic and relevant. Additionally, their expertise can help interpret complex wiring systems, reducing the risk of errors during repairs. Many dealers also offer free or paid access to wiring diagrams, making it a trusted resource for both DIY enthusiasts and professional technicians. This ensures compliance with Kubota’s safety and operational standards.
How to Read a Kubota Wiring Diagram
Start by identifying the legend, which explains symbols and abbreviations. Locate the main power source and trace circuits through colored lines and connectors to components.
Understanding Symbols and Notations
Kubota wiring diagrams use standardized symbols to represent electrical components. Common symbols include circles for switches, rectangles for relays, and zigzag lines for resistors. Arrows indicate the flow of current, while ground symbols (often a downward-pointing triangle) show where circuits connect to the chassis; Color-coded lines differentiate between power, ground, and signal wires. Reference keys or legends are often included to decode complex notations. Understanding these symbols is crucial for tracing circuits and diagnosing issues accurately. Always refer to the diagram’s legend to ensure proper interpretation of the wiring layout and connections.
Color Coding in Kubota Wiring Diagrams
Kubota wiring diagrams utilize color coding to simplify circuit identification and troubleshooting. Each wire is assigned a specific color to indicate its function, such as red for positive power lines, black for ground, and yellow or orange for signal or control circuits. This standardized system ensures consistency across different models and reduces confusion. For example, green wires often represent safety ground connections, while blue or purple wires may denote accessory or control functions. Always refer to the diagram’s legend to decode the color scheme accurately, as variations may exist between models.
- Red: Typically indicates positive power supply lines.
- Black: Usually represents ground or negative connections.
- Yellow/Orange: Often used for signal, control, or warning circuits.
Color coding enhances readability and ensures safe, efficient repairs.
Locating Components on the Diagram
Locating components on a Kubota wiring diagram is straightforward when using the diagram’s labels and reference numbers. Each component, such as fuses, relays, or sensors, is clearly marked with identifiers that correspond to the tractor’s electrical system. Use the diagram’s legend to decode symbols and abbreviations. Components are often grouped by function, such as ignition, lighting, or hydraulic systems. Trace wires by following their color coding or reference numbers to identify connections. For complex systems, enlarge the diagram or use zoom tools to pinpoint specific parts. Always cross-reference with the tractor’s manual for accurate identification.
- Labels and reference numbers: Guide identification of components;
- Color coding: Helps trace wires and connections.
- Legend: Explains symbols and abbreviations.

Common Components in Kubota Wiring Diagrams
Kubota wiring diagrams typically include components like the battery, alternator, fuses, ignition switch, and starter motor, which are essential for the tractor’s electrical system functionality.
Battery and Alternator Systems
The battery and alternator systems are crucial components in Kubota wiring diagrams, ensuring reliable power supply. The battery provides startup power, while the alternator charges it during operation. Proper connections, as shown in the diagrams, are vital for maintaining electrical balance. Overcharging or undercharging can lead to system failure, so consulting the wiring diagram is essential for troubleshooting. Regular maintenance, such as checking terminals and voltage levels, ensures optimal performance. These systems are interconnected with other components, making accurate wiring diagrams indispensable for diagnosing issues and performing repairs effectively.
Fuses and Circuit Breakers
Fuses and circuit breakers are essential for protecting Kubota electrical systems from overcurrent and short circuits. These components are clearly identified in wiring diagrams, showing their locations and ratings. Blown fuses or tripped breakers often indicate overloaded circuits or faulty components. Consulting the diagram helps trace affected circuits and identify the root cause. Regular inspection of fuses and breakers is crucial for preventing electrical failures. Replacing them with the correct specifications ensures system safety and reliability. Proper maintenance of these components is vital for uninterrupted operation of Kubota equipment, as outlined in the wiring diagrams.
Ignition and Starter Motor Systems
The ignition and starter motor systems in Kubota tractors are critical for engine operation. Wiring diagrams detail the connections between the ignition switch, starter motor, and related components like relays and fuses. These diagrams show how power flows from the battery to the starter motor when the ignition key is turned. Troubleshooting issues like failed engine starts often involves consulting the wiring diagram to identify faults in the ignition circuit. Proper wiring connections and fuse ratings are essential for reliable operation. Regular inspection of these systems, as outlined in the diagrams, ensures smooth engine starting and prevents electrical failures.

Troubleshooting with Kubota Wiring Diagrams
Kubota wiring diagrams simplify troubleshooting by visually mapping electrical circuits, helping identify faulty components or connections. Use them to trace issues like short circuits or malfunctioning sensors.
Identifying Common Electrical Issues
Kubota wiring diagrams are invaluable for diagnosing electrical problems, such as blown fuses, faulty sensors, or malfunctioning glow plugs. Common issues include short circuits, open circuits, or corroded connections. Symptoms like intermittent power, warning lights, or non-starting engines often indicate electrical faults. By referencing the wiring diagram, users can trace circuits to pinpoint issues, ensuring repairs are efficient and safe. For example, if the starter motor fails, the diagram helps locate the relevant circuit and components to check. This systematic approach prevents guesswork and minimizes downtime, making it essential for maintaining Kubota equipment effectively.
Using the Diagram to Trace Electrical Circuits
Using a Kubota wiring diagram, users can trace electrical circuits systematically, starting from power sources like the battery or alternator. By following the diagram, one can identify connections through fuses, relays, and switches. Color-coded wires and symbols simplify the process, ensuring accurate tracing. For example, tracing the starting circuit can help diagnose ignition issues. This method helps pinpoint faults efficiently, reducing downtime and ensuring safe, effective repairs. Regular practice enhances familiarity with the diagram, making troubleshooting faster and more precise for Kubota tractor owners and technicians.
Replacing Faulty Components
Kubota wiring diagrams are crucial for identifying and replacing faulty components. By analyzing the diagram, users can pinpoint problematic parts, such as sensors or relays. Once identified, disconnect the power supply before starting repairs. Remove the faulty component carefully, ensuring all connections are traced and noted. Install the new part according to the diagram, securing it properly. After replacement, reconnect the power and test the system to ensure functionality. Always use appropriate tools and follow safety guidelines to avoid further issues. Accurate replacement ensures optimal performance and prevents future electrical failures.

Popular Kubota Models and Their Wiring Diagrams
Kubota L, M, and B series tractors are widely popular, with wiring diagrams readily available online, ensuring easy access for repairs and maintenance of these models.
Kubota L Series Tractors
Kubota L series tractors are renowned for their versatility and durability, making them ideal for both agricultural and landscaping tasks. Their wiring diagrams provide a clear layout of electrical circuits, including battery, ignition, and starter systems. These diagrams are essential for diagnosing issues like faulty fuses or malfunctioning sensors. By referencing the Kubota L series wiring diagrams, users can efficiently trace circuits and perform repairs, ensuring optimal performance. The availability of these diagrams in PDF format online makes maintenance and troubleshooting more accessible for operators and technicians alike. Regular updates ensure compatibility with the latest models, enhancing reliability.
Kubota M Series Tractors
Kubota M series tractors are high-performance machines designed for heavy-duty farming and construction tasks. Their wiring diagrams are comprehensive, detailing complex electrical systems, including power take-off (PTO) and hydraulic circuits. These diagrams are crucial for troubleshooting issues such as faulty relays or wiring harness problems. By referencing Kubota M series wiring diagrams, technicians can efficiently diagnose and repair electrical faults, ensuring uninterrupted operation. Available in PDF format, these schematics are easily accessible online, catering to both professionals and enthusiasts. Regular updates ensure they remain relevant for the latest M series models, promoting efficient maintenance and repair practices.
Kubota B series tractors are compact and versatile, widely used for small-scale farming and landscaping. Their wiring diagrams are essential for maintaining and repairing electrical systems, such as ignition circuits and lighting. These diagrams, available as downloadable PDFs, provide clear layouts of components like fuses, relays, and sensors. Technicians can use them to trace circuits and identify faults efficiently. The B series wiring diagrams are particularly useful for diagnosing common issues like faulty alternators or starter motors. Accessible online, they support owners in keeping their tractors operational, ensuring reliability and productivity for various agricultural tasks. Regular updates ensure compatibility with newer models, making them indispensable resources for both professionals and DIY enthusiasts. Always disconnect the battery before starting repairs to prevent electrical shocks. Use proper tools and ensure good lighting to avoid accidents while working with Kubota wiring diagrams. Before initiating any repairs using a Kubota wiring diagram, ensure the tractor is turned off and the ignition switch is in the “OFF” position. Disconnect the battery to prevent unexpected power surges or electrical shocks. Always ground the equipment properly to avoid static discharge, which can damage sensitive components. Wear appropriate protective gear, including gloves and safety glasses, to minimize risks. Consult the official Kubota manual or a certified technician if unsure about any procedure. Double-check all connections and ensure tools are in good condition to avoid accidents during the repair process. When working with Kubota wiring diagrams, it’s crucial to use the correct tools and equipment to ensure accurate diagnostics and safe repairs. Essential tools include a multimeter for voltage and resistance testing, wire strippers for repairing connections, and a circuit tester to identify faulty circuits. A set of wrenches and screwdrivers is necessary for accessing electrical components. Additionally, keep replacement fuses, relays, and connectors on hand. Using the right tools prevents damage to the electrical system and ensures compliance with the wiring diagram’s instructions. Always refer to the official Kubota manual for model-specific tool recommendations to avoid complications during repairs. When working with Kubota wiring diagrams, common mistakes include misidentifying components, ignoring color coding, or incorrectly replacing parts. Always cross-reference the diagram with the actual tractor to ensure accuracy. Avoid assuming wire colors or connections without verification. Overlooking safety precautions, such as disconnecting the battery, can lead to electrical shocks or damage. Never skip steps in the diagram, as this can result in faulty repairs. To prevent errors, use the correct tools and consult the official Kubota manual for guidance. Properly trace circuits and verify connections before making changes to ensure reliable operation and safety. Kubota wiring diagrams are indispensable for maintaining and repairing tractors, offering clear electrical system guidance; By following these diagrams, users ensure safe and efficient troubleshooting and component replacement. Kubota wiring diagrams are invaluable tools for tractor maintenance and repair. They provide clear, detailed schematics to help users identify and fix electrical issues efficiently. With these diagrams, operators can ensure their equipment runs smoothly, reducing downtime and extending machine life. Always refer to official Kubota manuals or trusted sources for accurate and up-to-date information. Proper use of wiring diagrams not only enhances safety but also ensures compliance with manufacturer guidelines, making them an essential resource for both professionals and DIY enthusiasts. While Kubota wiring diagrams are excellent for DIY troubleshooting, complex electrical issues may require professional expertise. If unsure about repairs or modifications, consulting a certified Kubota technician ensures safety and prevents further damage. Professionals have the tools and knowledge to handle intricate systems effectively, guaranteeing reliable results. Don’t hesitate to seek help when needed to maintain your tractor’s performance and longevity.Kubota B Series Tractors
Safety Tips When Working with Kubota Wiring Diagrams
Precautions Before Starting Repairs
Proper Tools and Equipment
Avoiding Common Mistakes
Final Thoughts on Using Kubota Wiring Diagrams
Encouragement to Seek Professional Help When Needed